
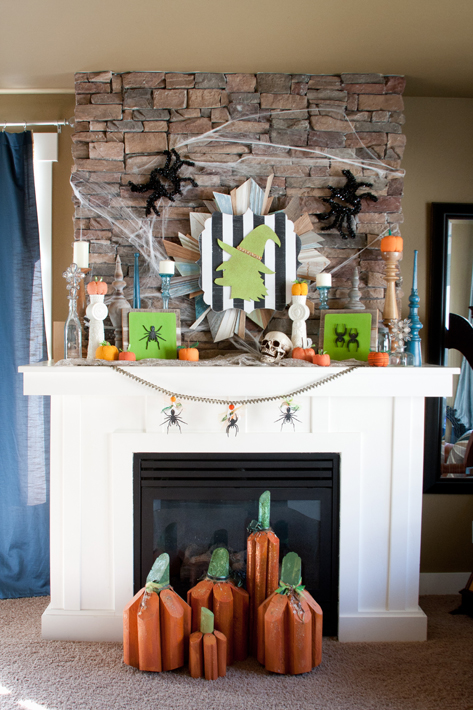
I made these pumpkins a few years ago at a church craft night. I am not sure who found the idea or where, but I have to share them. I love these. These are nice because you can leave them out for Halloween and Thanksgiving. They look great on a front porch OR inside.

Here is what you need to make these pumpkins-
for the middle fat one -One 8 ft long landscaping lumber from Home Depot or Lowe’s. It is a red color
short one- One 8 ft long tree post or skinny landscaping lumber it is usually green
Tall one- One and a half of the 8ft long tree posts or skinny landscaping lumber
Chop saw or miter saw
Drill and drill bit
2 and 3 inch screws
Orange and green latex paint
glitter, ribbon, and or fake flowers

Start by cutting your wood pieces.
For the tall skinny one you will want one 30 in piece for the middle and six 23 in pieces.
For the fat middle one you will want one 20 in and six 14 in pieces.
The short one is one 15 in and six 12 in pieces.
Start by cutting the end at a 45 degree angle. Then measure out from the tip- down, for your long piece. Cut the end of that flat. Then measure out your shorter piece from the flat part, cut it at 31.6 degree angle. Take that piece and use it as a template for your 5 other pieces that circle the tall middle piece you cut first.

Your next cut will be flat again. Then cut again at 31.6 degrees, alternate cutting angled and flat to get all you can out of the wood.


Once you have cut all your wood. Pre-drill diagonal holes into the tip of the six pieces that go around the middle piece. Also pre-drill a hole straight down from the first hole at the base of the wood.


Hole at the base pictured above.
For the fat one drill diagonally up from the bottom into the middle piece. You will want to pre-drill this as well.

You can use the 2 in screws here and at the top of all the pieces.
The 3 inch screws are used on the skinny ones to go in the sides at the base.
See screws in base in picture above. Now you can just paint over those or you can use a wood filler to cover them up. I never notice them once they are painted. But, it’s up to you.
Now paint them and decorate them! If you leave them inside you might want to put a circle of felt on the bottom.

I added glitter to mine, cuz I love me some glitter! Added my ribbon, maybe hot glue a flower, and done!

I love these! I’ve been dying to figure out how they were made after seeing them on justaddsunshine. So glad u posted!