I am often asked how I paint furniture pieces. The answer is different for every project, depending on the piece or the look I am after. But! There is a bit of a method to my madness. Here are a few of my secrets spilled to you. 🙂

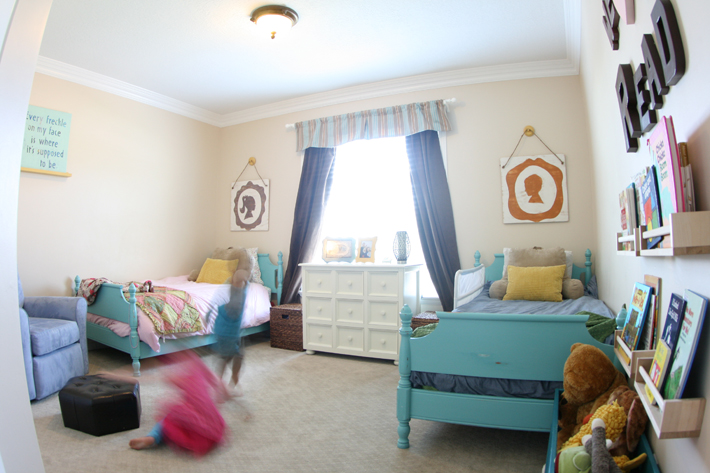
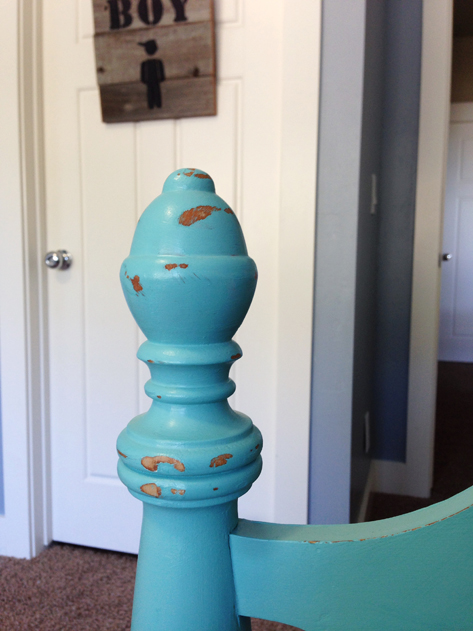
I’ll outline my usual step by step process using these two twin beds. I refinished these for my kids’ room. My sister and I used these beds when we were little. EVEN COOLER– They were my great grandparents beds back in the day when a husband and wife actually slept in separate beds!! CRAZY! Crazy that married people slept in different beds. Crazy that these beds are THAT old and still super sturdy.
NOTE- Everyone has their own way of painting furniture. I don’t claim to know everything, but trial and error has helped me find my methods. You will find what works for you through trial and error as well. Mad skills are only gained by practice. 🙂
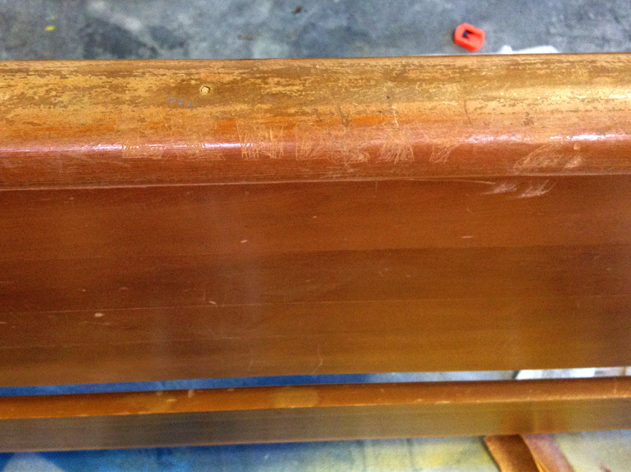
First things first! I usually don’t sand, UNLESS!
1. The varnish or paint is already chipping.
2. There are uneven spots or scratches in the wood.
3. The piece has a super glossy top coat. In this case, I will go over it lightly with 120 grit sand paper. I said lightly! 🙂 Lets not tire ourselves out too much! 😉
4. The piece is already painted and I want a distressed finished look, with natural wood showing through in a few places. I will then sand just certain parts of the piece down to the natural wood and create a map as to where those are. I will continue to sand those spots after each coat of paint so I won’t loose the natural wood.
I no longer strip or sand entire pieces. I would ONLY do that if I were to stain a piece.
Of course my crafty 10 year old self carved my name in a few places on these bed frames when I was little (sorry mom and dad). I definitely had to sand that down before starting my refinish. (It says Lindsay Z., in-case you can’t see it)
The next important part to think about: Brushes! Invest in foam brushes.
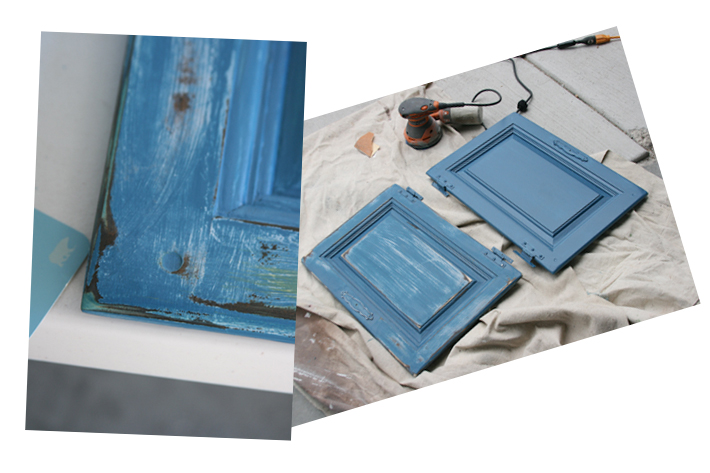
I use a foam brush when I am not spraying. A foam brush will help eliminate brush strokes. If I want my piece to look more aged, I will use a natural or synthetic bristle brush. When I painted the doors on this blue hutch I used a bristle brush. Sometimes brush strokes make a piece really pop.
If a smooth finish is what you are after, using a product called Flotrol can really help. It comes in an orange bottle in the paint section. Add it to your paint to help the paint lay flat, smoothing away any brush strokes.
When there is nothing to sand off, I usually start with priming. I prime with Gripper Primer. It comes in grey or white. You can also have the person working at the paint counter can tint it for you if you would like. After trying about 4 other brands of primer, this is by far my favorite. Gripper Primer is the best if you don’t want to sand, and if want your paint to stick without chipping or scratching off.
I do one coat of primer. The primer coat does not need to cover the piece perfectly. The point of sanding or priming is to give your paint just enough grip that it will have something to stick to.
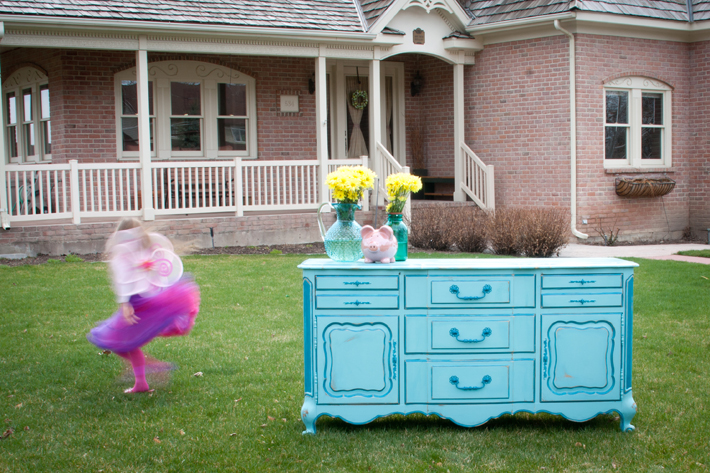
Now Paint! I like to use regular ol’ latex paint from Home Depot. The Behr Ultra line, with the paint and primer in one, is my favorite. Normally, I buy it in a flat finish. I am not a fan of Lowes paints – they seem to be more watery to me. Milk paint is really the best stuff you could use, but it’s pricey and can be hard to find. Chalk paint can also be fun. I’ll share more about that another day. 🙂
Once the piece is primed, then I paint my first coat. Two to three coats of paint usually covers it for me with the the Behr Ultra paint.
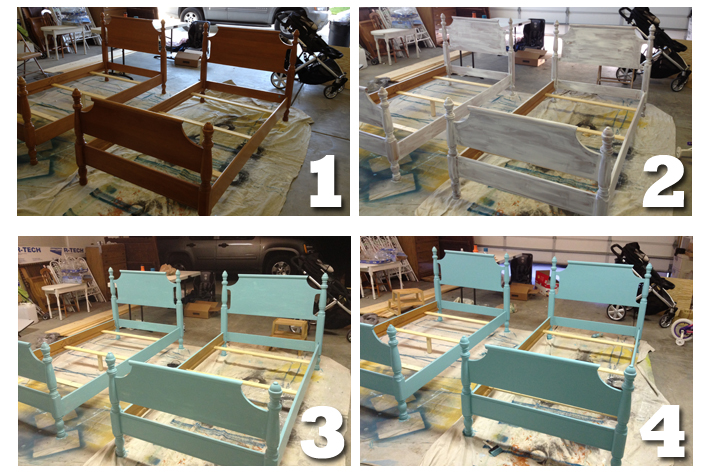
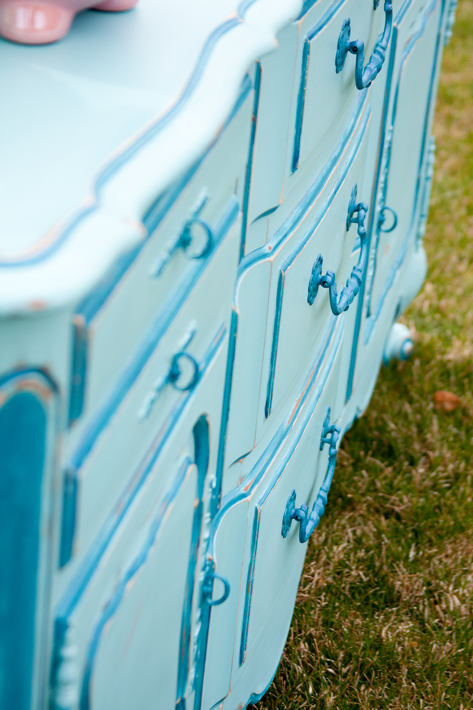
Let the paint cure for a day or so before distressing. I distressed this bed with 120 and 100 sand paper on a sanding block. Then to smooth out just those spots I sanded lightly with a 220 grit.
ALMOST DONE: How I finish a piece!
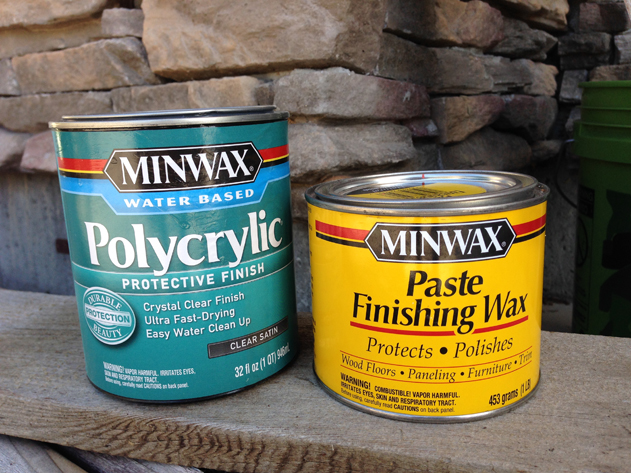
I almost always use Minwax Finishing Wax. It is easy to use and I like the end result. If I am doing a table or a high traffic piece I will use a Satin Polycrylic. It all depends on the look I am trying to achieve and the use of the piece. If using a poly make sure it says “does not yellow”. Some of them do yellow pretty quickly, and it is really annoying. NOTE! When using a water based paint, use a water based top coat – And when using oil paint, use an oil based top coat. Don’t mix and match.
Good luck!! Some of my favorite pieces were total mess ups or experiments. So be fearless and just go for it!
You can do it 🙂
-TO RECAP-
Sand only if you must. Invest in foam brushes. Buy a lovely latex paint in a flat finish. Prime with Gripper Primer. Paint 1-3 coats of paint. Distress, glaze, or antique after final coat. Finish with a wax or poly that won’t yellow. Enjoy your hard work and beautiful piece.
You are making me finally feel daring enough to try… Thanks!
Great tips! Congrats on the blog…it looks amazing!
Yes!! I love this! Thank you for simplifying the art of painting furniture. I’m feeling daring now, too! Lol! Love the new site and pinning for future reference.
Thanks Lori! I hope you do paint something amazing 🙂
Love this tutorial! You are so good hitting all the steps. I’m afraid I’m not so good when painting my pieces! 🙂 hugs!!! xo
Thanks Kristy!! 🙂
May I ask what your favorite foam brush is? I find that the cheap ones tear after the first two swipes across a piece. Your work is beautiful!!
Oh foam brushes are SO annoying! The best ones I have used are from Home Depot. But, they still tear and I have to use a lot more than I want. It’s a pain. You could try a normal brush and some flotrol- that helps flatten out brush strokes really nicely. Good luck and thank you!!!
Thank you so much for your posts about painting furniture. I’m about to take on several furniture painting projects in my own home, and I wouldn’t even know where to begin without your ‘tutorials’. So THANK YOU! I hope they turn out as pretty as yours!
Hi! Your finished shared room is unbelievable!! Would you mind sharing the gray wall color and the paint color you used on the beds? I looked on the blog but was unable to find it. Love your vision, you are extremely gifted!
Thanks so much,
Erin
Mindful Grey from Sherwin Williams and I will have to find the bedding one. 🙂 I’ll look for it, I know it was a Behr Ultra color