Let’s get crafty!!! Have you ever used a Jig Saw?!It is one of my all time favorite tools to use. Of all my tools that I use for crafting the Jig Saw probably comes in second only to my hot glue gun. In my video about making this shamrock craft I share a couple tips on how to use one. Jig Saws are great for cutting shapes out of plywood like I did for this craft. For the complete tutorial check out the video below.
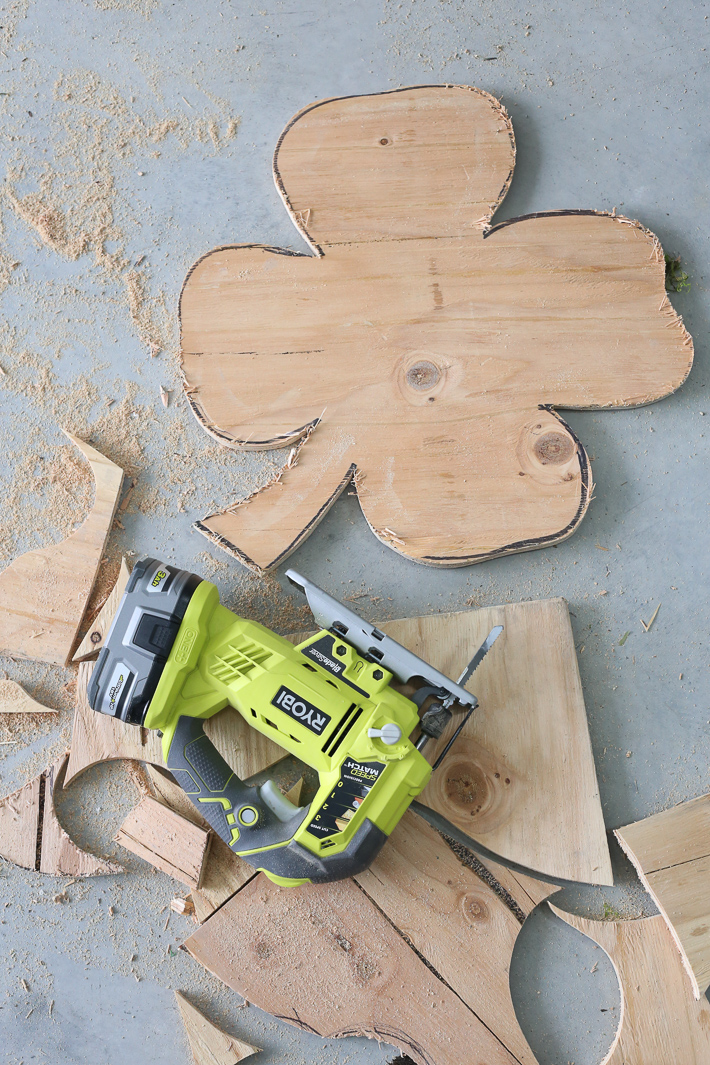
I recently got this Ryobi Jig Saw and have loved using it. I did upgrade the battery so it would last longer during projects.
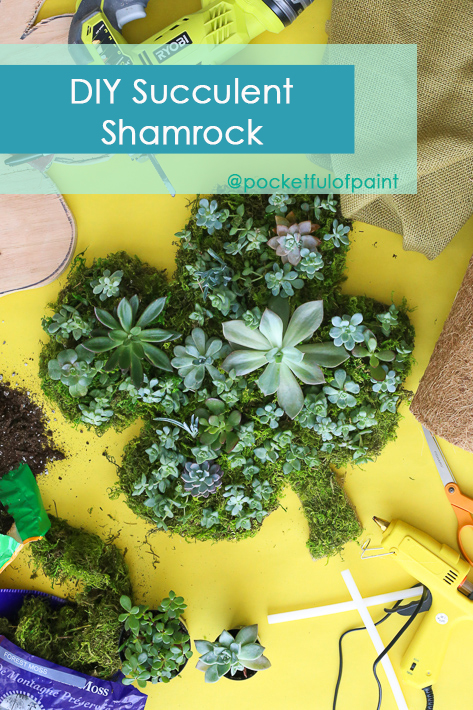
Alright! For this project you will need a few things!
- Jig Saw
- Plywood
- A Sharpie
- Coconut fiber sheet
- Moss
- Succulents
- Burlap
- Hot glue guns and sticks
- Scissors
- Hook for the back
- Floral pins (optional)
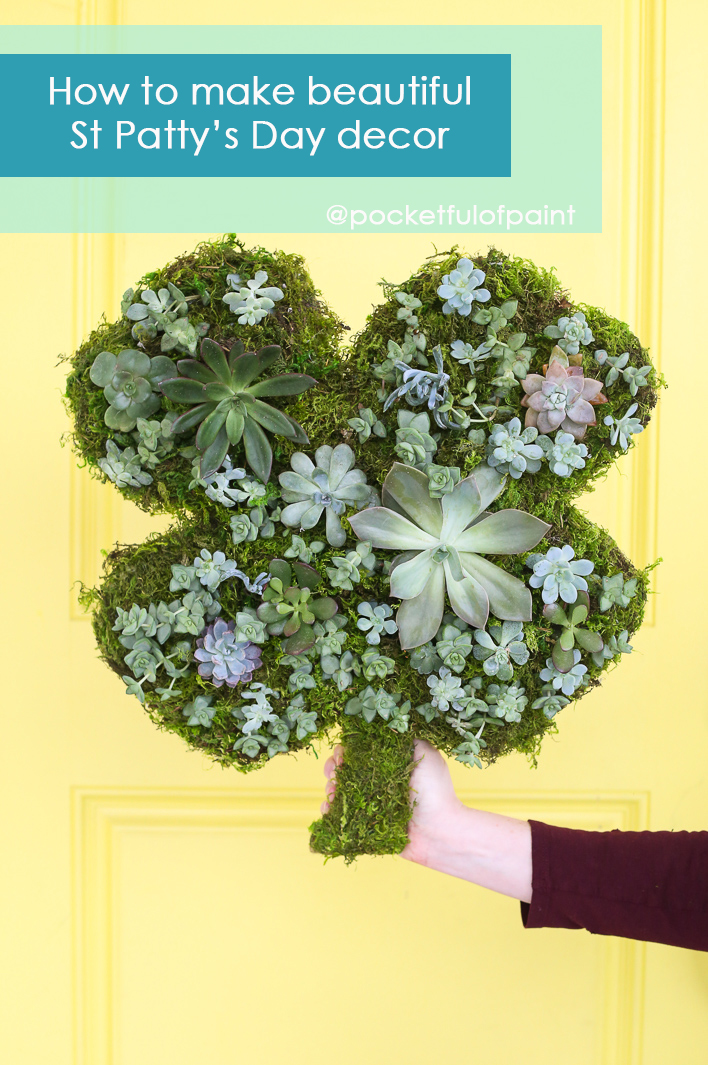
You will begin by drawing or tracing a shamrock onto your piece of plywood. As soon as that is ready put on safety glasses and headphones so you can safely cut out the shamrock with your Jig Saw.
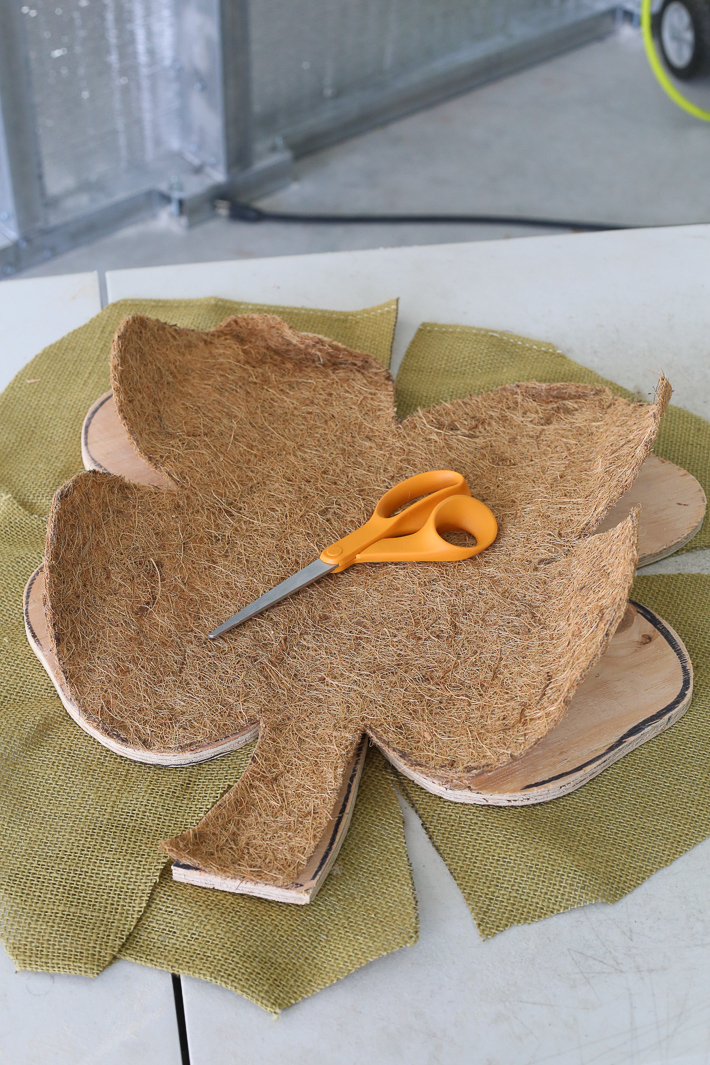
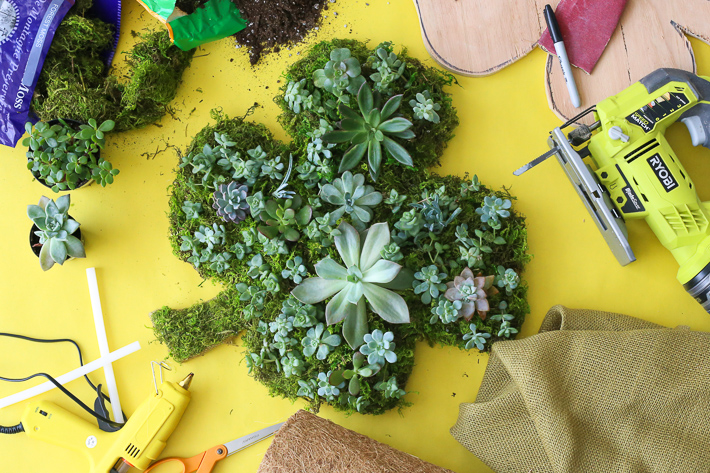
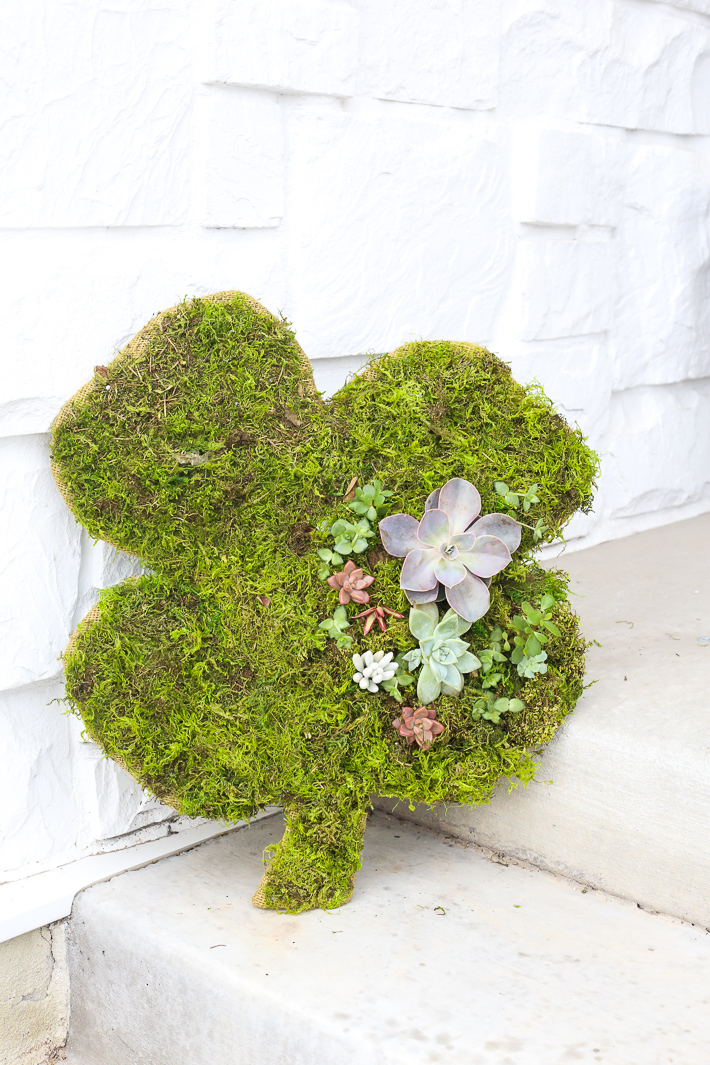
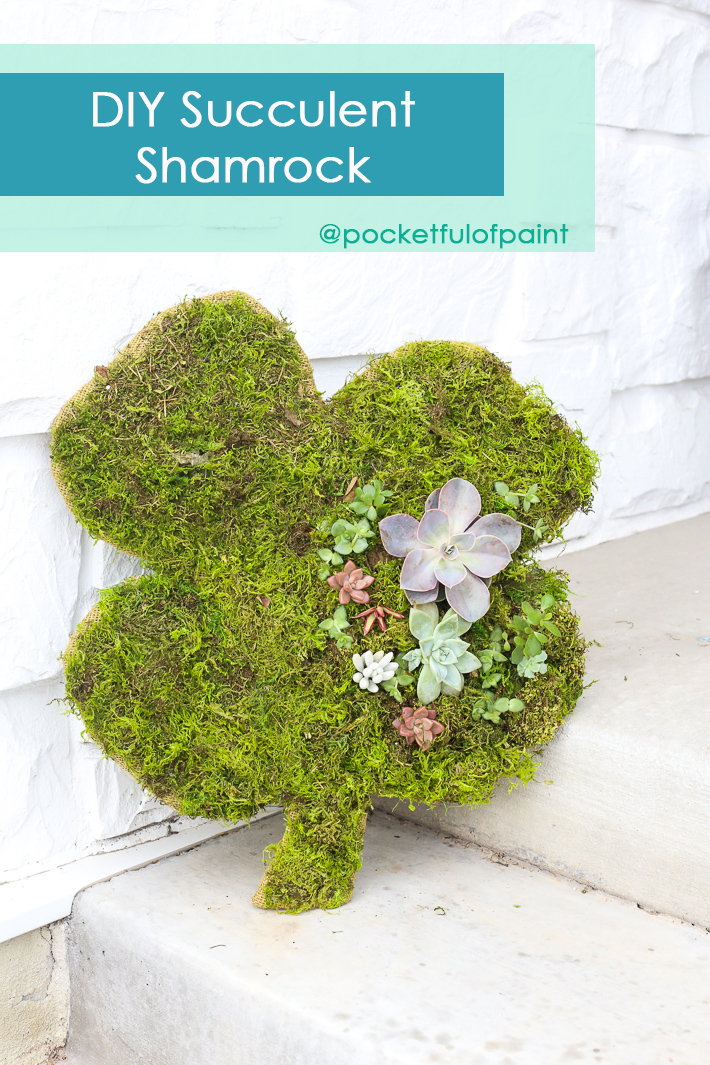
Once you have cut out the shamrock, get some 120 grit sandpaper and lightly sand the edges. Then you will trace and cut out a piece of the coconut fiber in the shape of your shamrock. Hot Glue Gun the coconut sheet to your plywood cutout. Roughly cut a piece of burlap around your shape as well. Make your rough cut about 2-4 inches wider that your wood piece. You will be using the burlap to wrap around the plywood and hold in the dirt for your succulents.
When you are gluing the burlap around your piece you want to leave one of the leaves open so you can pour dirt into the shamrock. Shake it to spread it inside and under the burlap.
Continue gluing to close up the shamrock. At this point I like to add a piece of felt on the back and add my hanging hook. It is much easier to add a hook on the back before the succulents are added to the top.
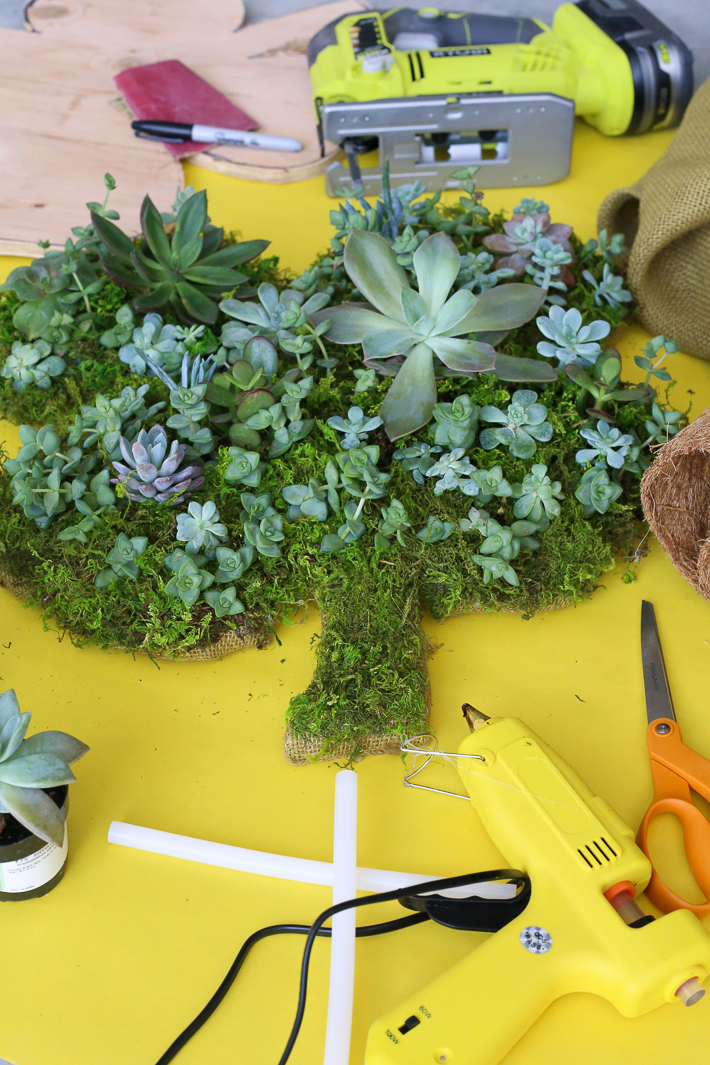
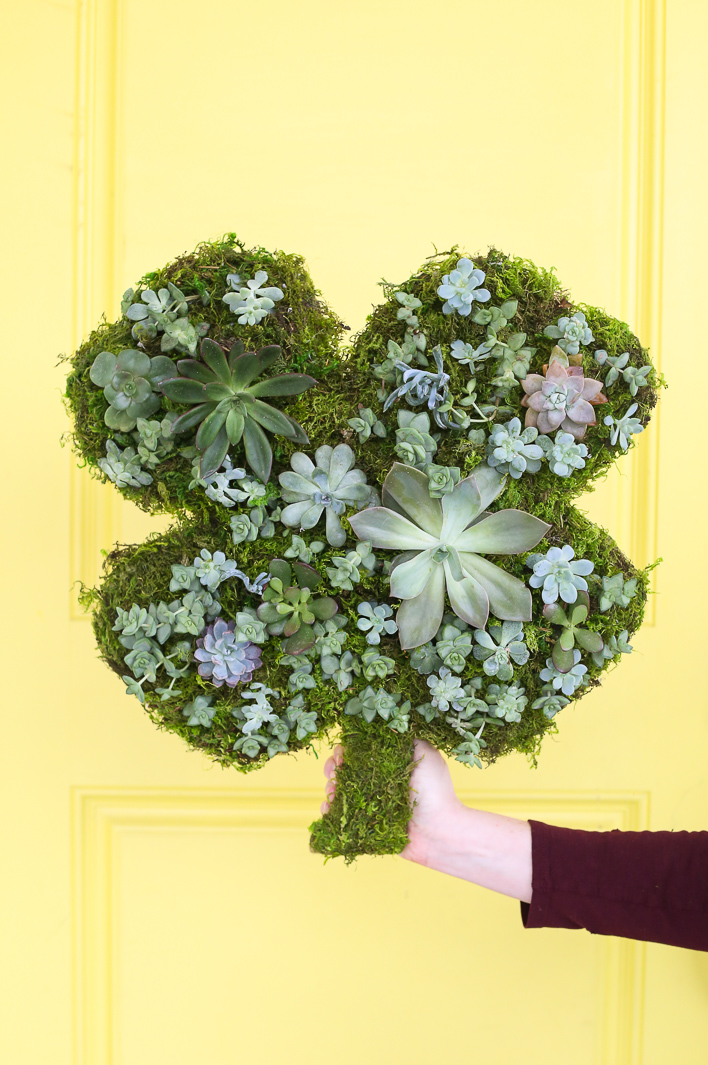
Cut small slits in the burlap and carefully slide in your succulents. Using your hot glue gun and clumps of moss, you will secure your succulents in the burlap. Glue on top of the burlap and push the moss around the roots to hold the succulent in place. Continue doing this until your shamrock is covered with plants and moss. A few of the smaller succulent pieces I added to this are just clippings. I glued directly to the ends of those and placed them on top of the moss.


Leave a Reply