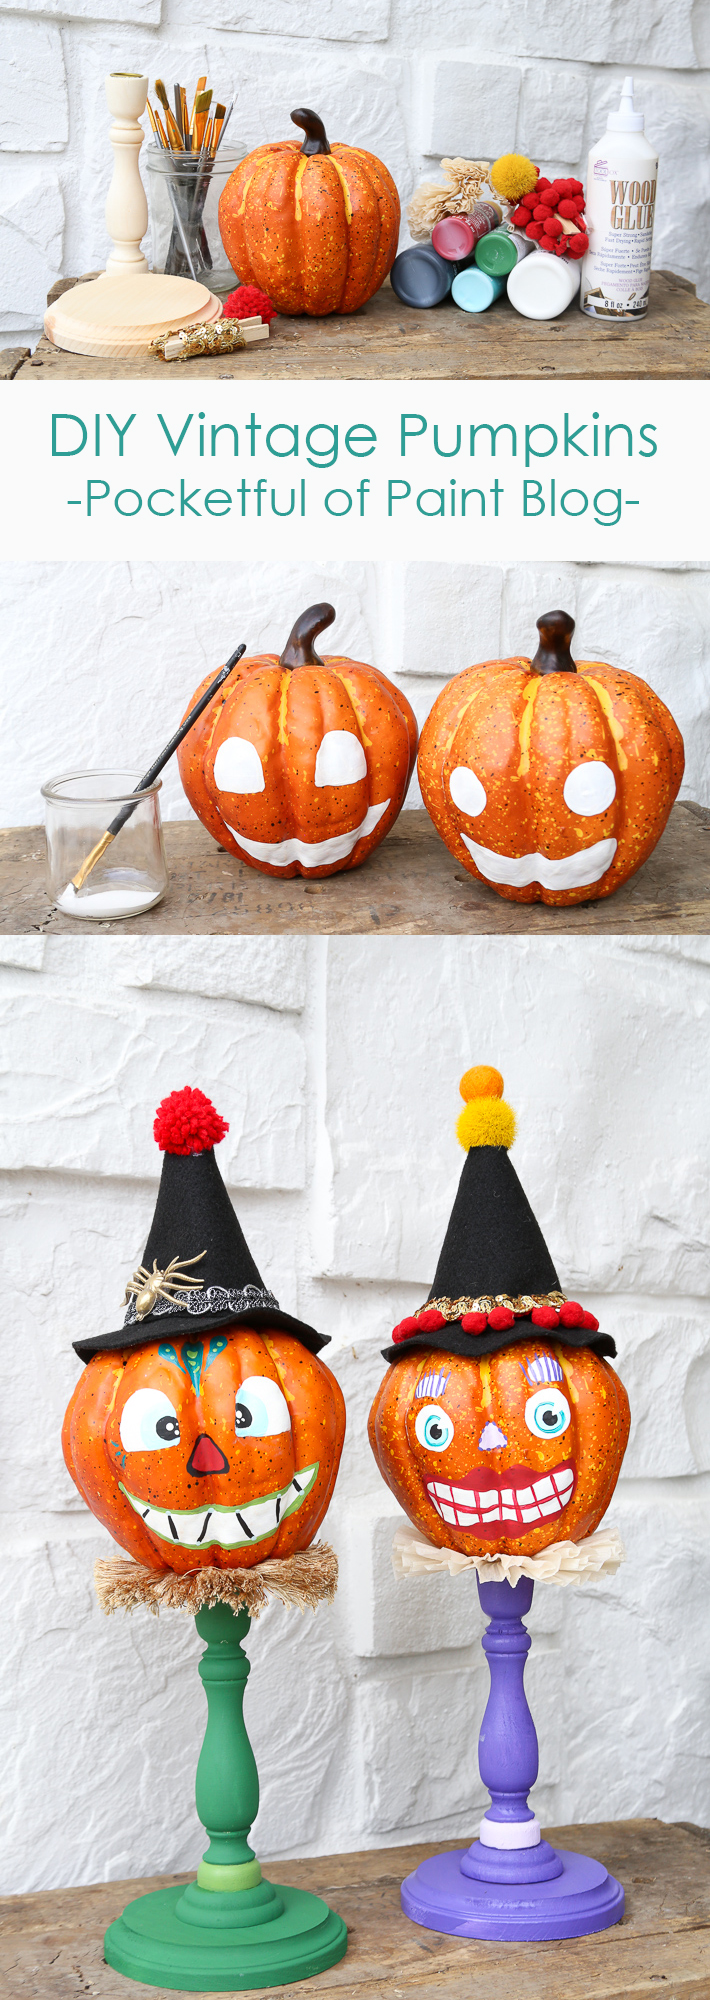
Halloween crafts are probably my favorite crafts. You can add as much kitschy do-dads as you want and it will still look good. On Halloween, more is more!
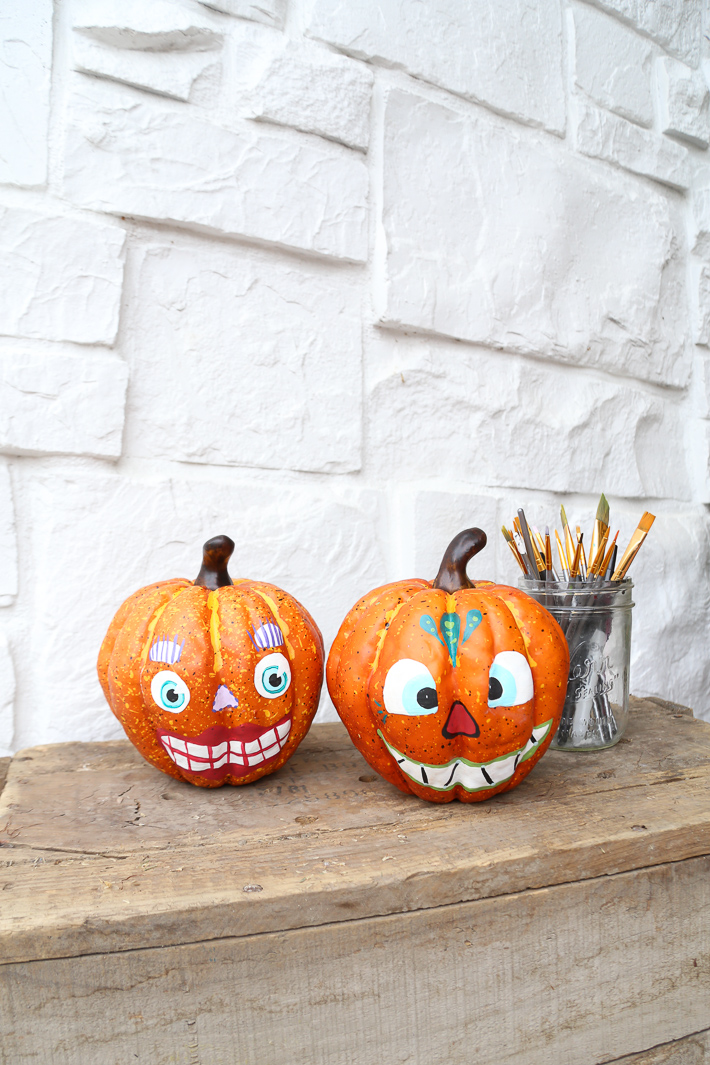
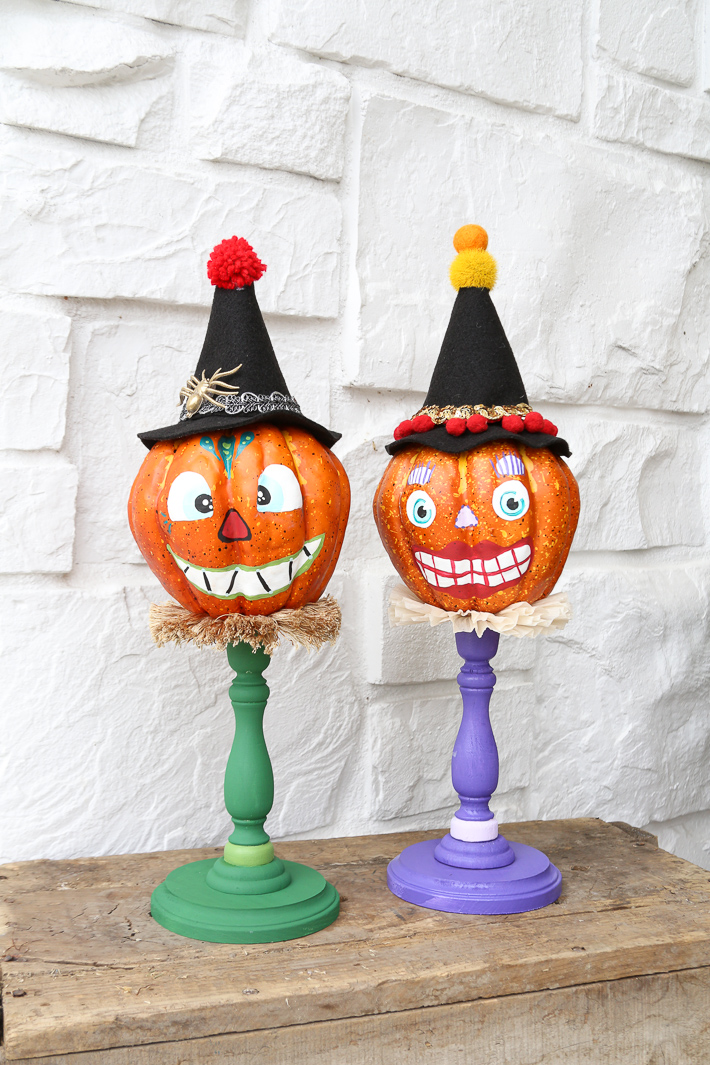
So, kitschy-tacky-vintage pumpkins here we come!! This project was inspired by the old vintage pumpkin candy pails that children used to have for trick or treating. They had crazy looking faces with big smiles and kooky eyes.
Let’s not beat around the bush, they were creepy! But, oh so fun and colorful.
Let’s do this….

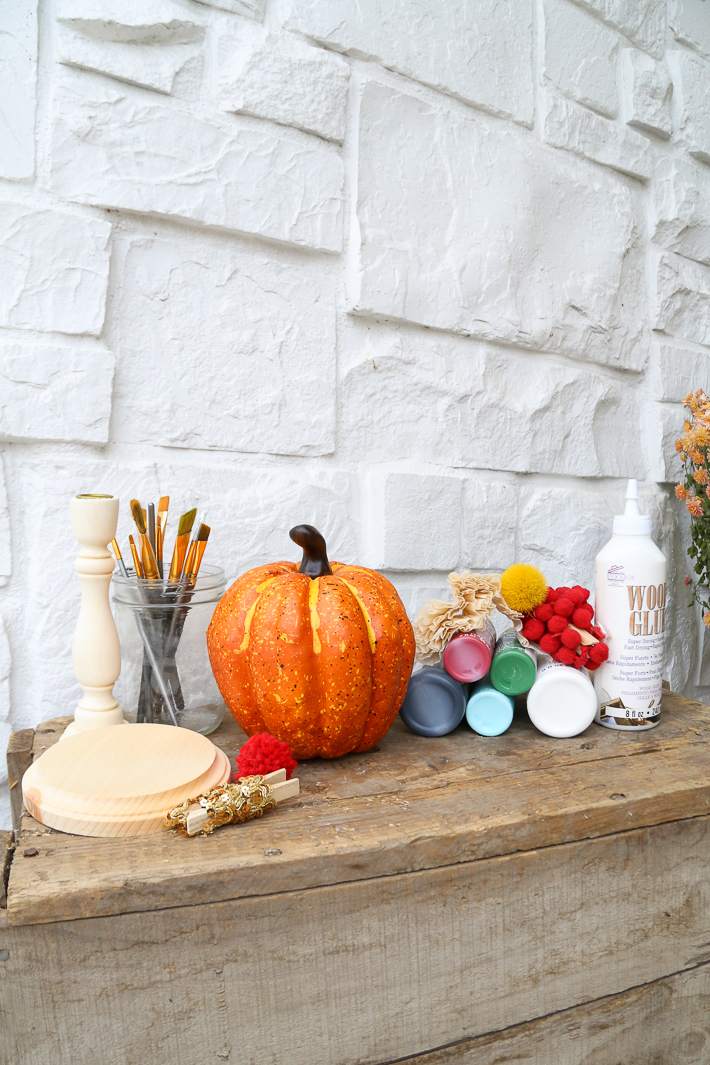
So, you are going to need a few supplies for this project.
Supply List:
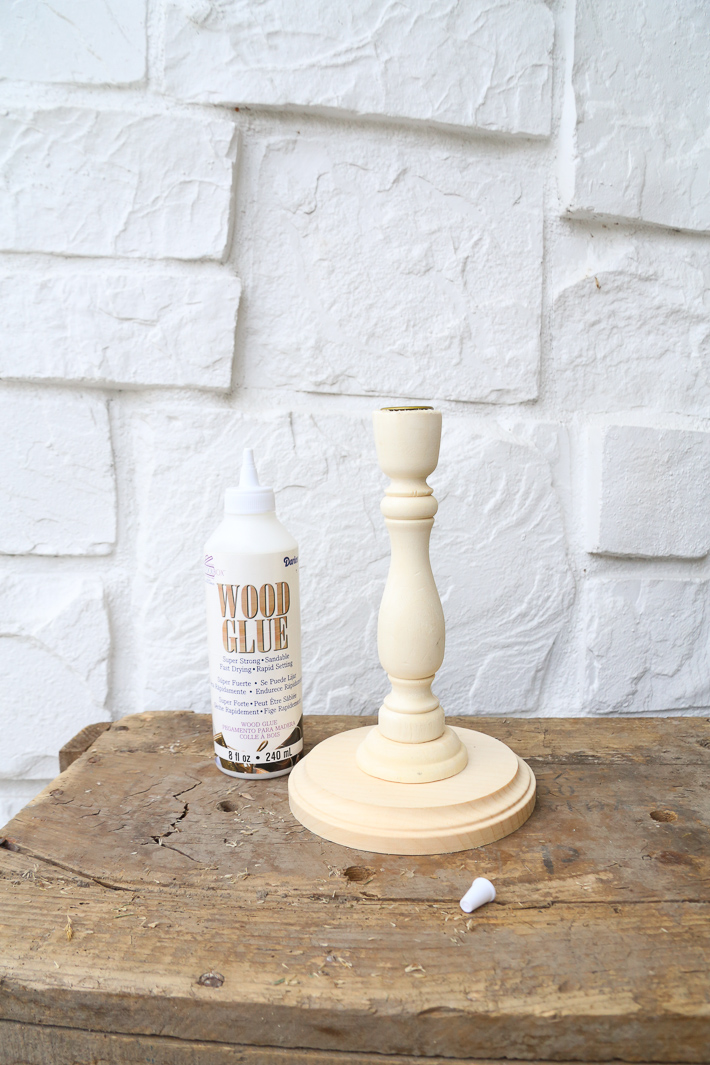
Wood Glue
Hot Glue and Glue Gun
2 Wood Plaques
2 Unfinished Wood Candlesticks – These are the cheapest at Hobby Lobby
Black Felt
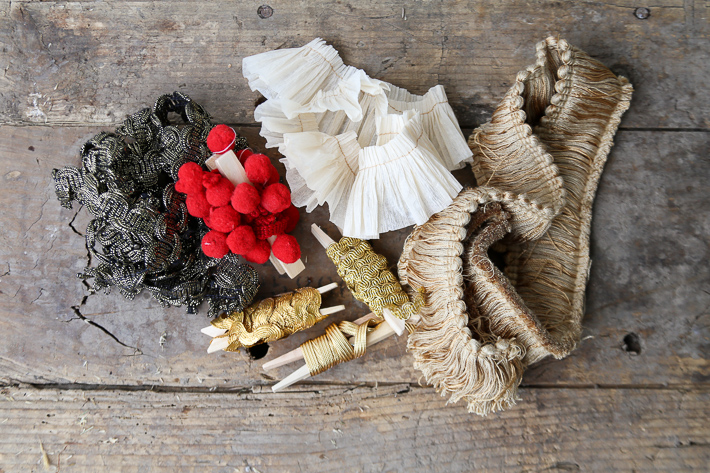
Ribbons and Trim for finishing touches
Two Fake Pumpkins
Craft Paint
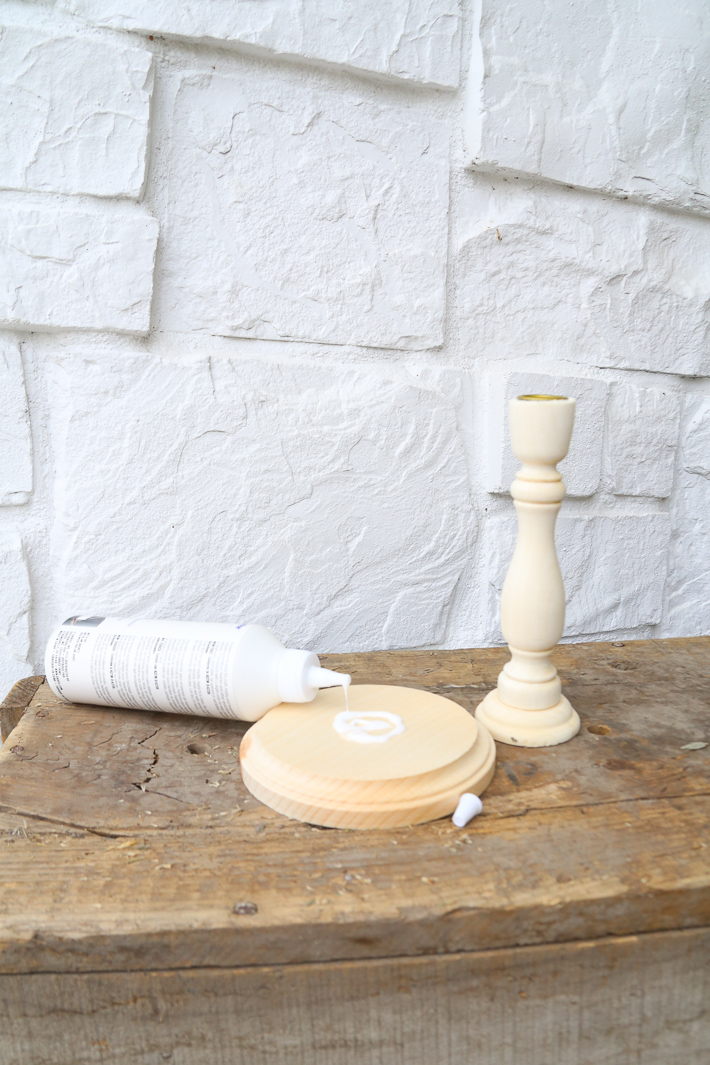
The first thing you are going to want to do it glue your round plaque to your candle stick. While that is drying you can start to paint white paint on your pumpkin.
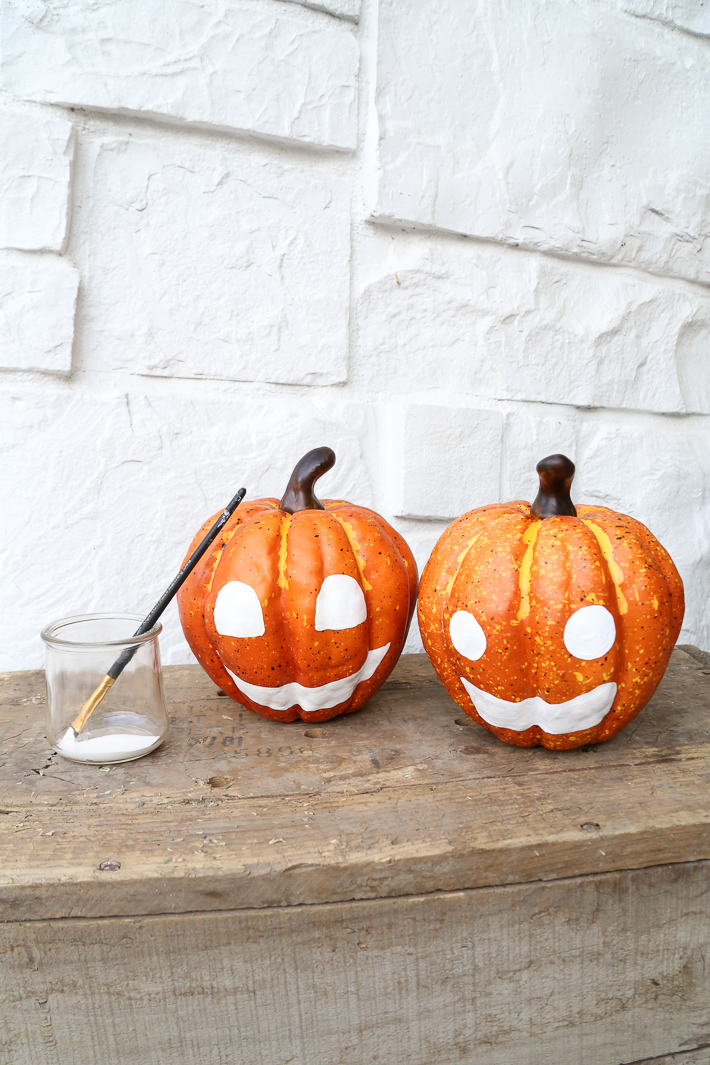
Use a blow dryer to speed up the process and then add the details of the face.
While your face dries go back and paint your candle sticks.

While those are drying you can start on your felt witch hats. These are VERY easy to make. Simply cut a half circle out of your felt for the main part of the hat and then cut an other circle for the brim. The little circle cut out in the brim is so that the hat will fit over the stem of your pumpkin.
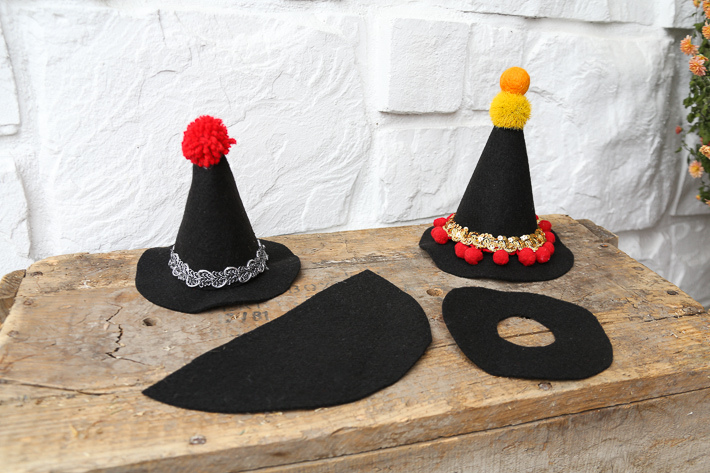
Wrap the half circle so that it looks like a cone. Once you are happy with the shape hot glue it in place.
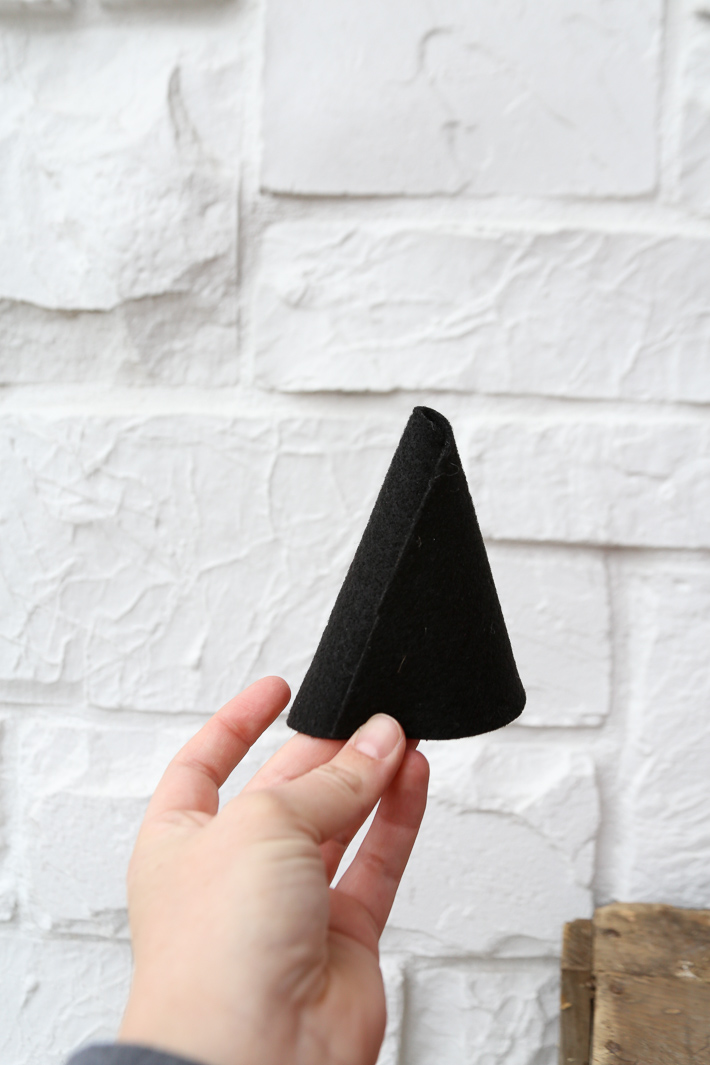
I cut the top of my hat off so that it was easier to glue a felt ball on the tip.
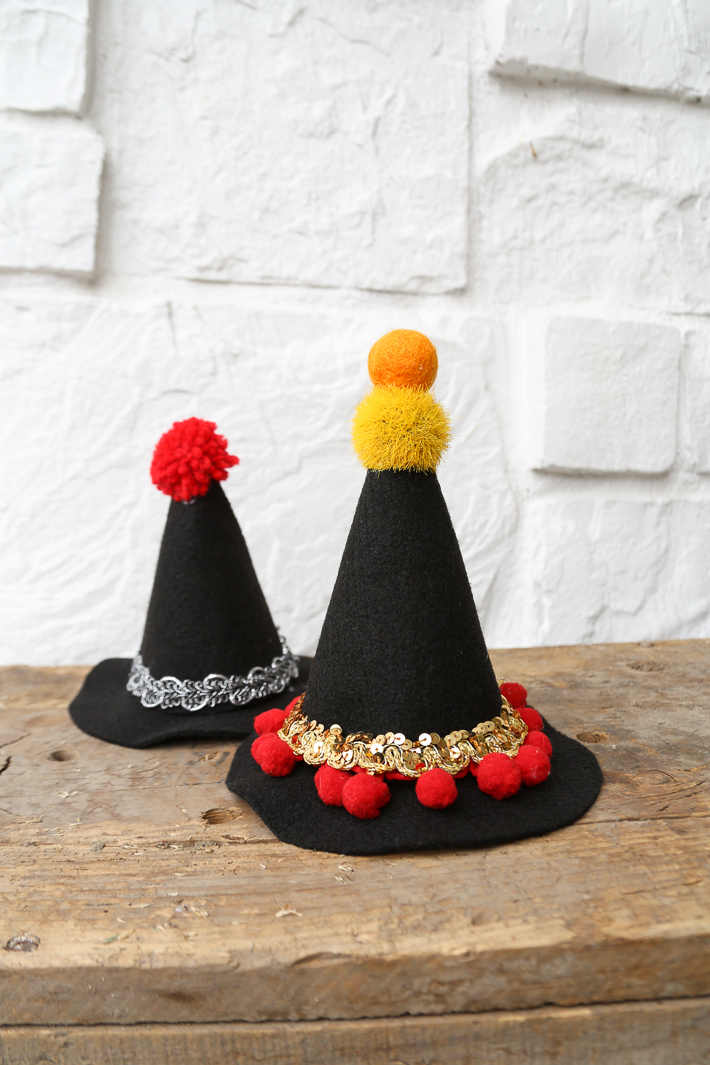
Now you can add trim, ribbon, spiders…whatever your heart desires.
You can also add some fun trim to the bottom of your pumpkin before gluing it to your candle stick. I glued a little felt circle to the top of the candle stick, then glued my pumpkin to that. It helped make the pumpkin more stable. After your pumpkin is on the candle stick go ahead and glue on your hat. And!!!!! You are done! Two silly little pumpkins ready to decorate your home.


Marbled Pumpkins
Leave a Reply